Manually adding air into a hydro-pneumatic pressure tank to correct a water-logged condition.
To correct a water-logged tank condition, you simply pump air into the pressure tank using a portable air compressor, while watching the pressure gauge. We recommend starting by adding just 5-10 psi of air into the tank.
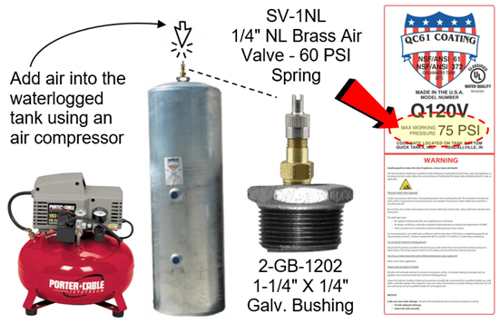
WARNING: Don't over pressurize the water tank. If you exceed the water tanks safe operating pressure rating it may burst, causing serious injury or even death. If you watch the pressure gauge on the water tank and keep the pressure at or below the pressure gauge cut-out pressure (typically 50 or 60 psi) or below 70 psi if your tank was totally waterlogged at the start of the procedure and the pump had just shut off, you should be okay.
CAUTION: Some pressure gauges may no longer be working properly or may be slow to respond to changes in pressure. The gauge inlet port that senses water pressure may be clogged with debris. If your water pressure gauge does not change steadily as water (or air) is entering or leaving the water tank it should be replaced with a new one.
NOTE: You may find the air valve is mounted on the tank tee installed in the bottom port of the tank. The air valve must be on the tank side of the check valve so the air can be injected into the tank. Do not get confused with the snifter valve that has the low-pressure spring which may be installed in the check valve body. The snifter valve is on the inlet side of the poppet of the check valve so air can be drawn into the drop pipe when the bleeders drain back after the pump stops.