PEX expansion fittings, or cold expansion fittings, are a great way to connect tubing and insert fittings. An expansion collar with a larger diameter than the tubing is overlapped at the end of the tubing and expanded to insert a fitting. The fit becomes stronger over time as the collar and pipe shrink back down due to shape memory and a watertight seal is created.
In this blog we will go over the tools required, and the step by step process for installing Boshart’s 720CEP-ECxx expansion collars. Please review all of the steps in the installation instructions before getting started.
Tools Required
- Pipe Cutter
- Cordless tube expander
Getting Started
There are several advantages to using cold expansion collars to connect tubing and fittings, specifically compared to crimp fittings. Installation is faster and easier, and there tends to be fewer leaks. There is less friction and greater flow without any pressure drops. There is no need for special calibration tools like go/no go gauges.
Boshart’s 720CEP-EC series cold expansion collars are made to standard ASTM F1960 which covers both plastic and metal fittings, including PVC and 304SS.
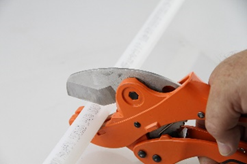 Step #1
Cut the tubing to the desired length using a pipe cutter. The tubing should be cut perpendicular to the length of the tubing. The cut should be smooth, burr free, and square to the end of the pipe. A rough, jagged, or angled cut could affect the connection between the fitting and tubing and cause it to fail.
Note: Do not use a hacksaw, pocket knife, hatchet, etc. Do not crush the outer diameter of the pipe with the cutter.
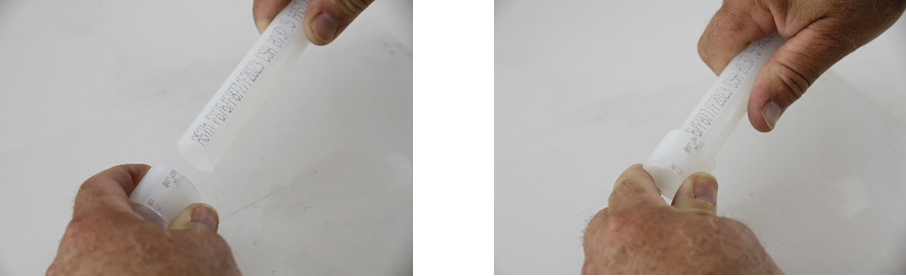
Step #2
Select the correct size expansion collar and slide it over the tubing. The end of the tubing should be 1/16th of an inch (1.6mm) to 1/8th of an inch (3.2mm) from being flush with the end of the expansion collar. A rule of thumb is to push the expansion collar onto the tubing until you feel the tubing with your thumb. Some expansion collars have built in stops which will position the tubing 1/16th of an inch from being flush with the end of the expansion collar.
Note: Don’t push the expansion collar past the end of the tubing.
Step #3
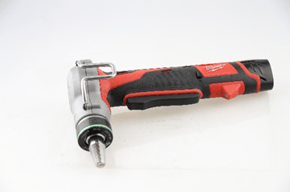 Using a cordless tube expander:
- Insert the expander head into the end of the tubing with the properly positioned expansion collar and expand the tubing. There should be a gap of 1/32nd of an inch between the wall of the tubing and the expander head.
- Hold the tubing in place.
- Press and hold the trigger on the expander tool to expand the tubing while holding the tubing in place. The expander tool will continue to cycle until the trigger is released. The expander head should rotate with each expansion cycle. Ensure that expansion is even in all directions.
- After each expansion cycle, insert the expander head further into the tubing, approximately 1/8th of an inch each expander head cycle. Repeat this until the tubing is snug against the shoulder of the expander head on the expander tool and then do one more expansion cycle. Refer to Table 1 for the recommended number of expansions for each size of tubing.

Expansion Cycle 1 Expansion Cycle 2 Expansion Cycle 3
Note: Do not over expand the tubing or collar. Do not force the tubing onto the expander between expansion cycles. Do not advance the expander head into the tubing further than 1/8th of an inch each expansion cycle. Do not make connections in ambient temperatures below 5 °F (-15 °C), refer to the cold weather installation guidelines below. Do not hold the last expansion.
Table 1: Number of expansions of 1/8th of an inch advances into the tubing for 3/8” to 2” nominal tubing sizes at 73.4 °F (23 °C) using cordless expansion tools.
|
Nominal Tubing Size |
DeWALT Power Tool |
Milwaukee Power Tool |
|
|
in. |
M12 |
M18 |
|
|
3/8 |
6-7 |
6-7 |
5 |
|
1/2 |
7-8 |
7-8 |
9 |
|
5/8 |
9-10 |
9-10 |
9 |
|
3/4 |
11-12 |
11-12 |
10 |
|
1 |
17-18 |
17-18 |
19 |
|
1-1/4 |
- |
- |
9 |
|
1-1/2 |
- |
- |
10 |
|
2 |
- |
- |
10 |
Note: The number of expansions listed in Table 1 is a guide only. The actual number of expansions required will vary due to technique, temperature, or tool used.
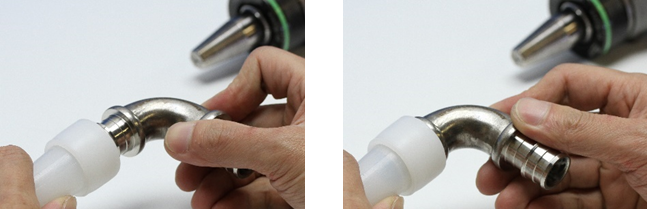
Step #4
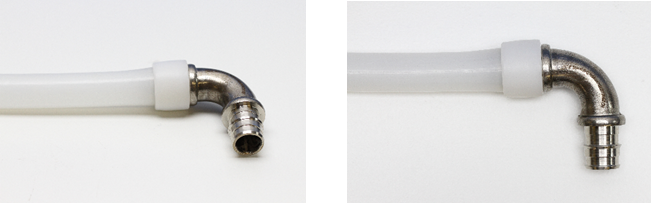
Quickly insert the fitting into the tubing until the expansion collar and tubing are stopped against the shoulder of the fitting. There should be some resistance when inserting the fitting. If the fitting is loose, hold the fitting in place until the tubing contracts enough to hold it in position and the number of expansion cycles should be lessened. If the fitting does not insert easily, remove the fitting, and perform one more expansion cycle.
Verify the connection is complete and visibly secure.
Note: If the expansion collar is more than 1/8th of an inch away from the fitting shoulder, the fitting needs to be cut out and replaced. Slide a new expansion collar on the tubing and follow the installation instructions from Step #2. If the barbs on the insert fitting are damaged, replace the fitting.
Step #5
ASTM F1960 expansion collars require a minimum spacing distance between fittings for proper installation. Refer to Table 2 for minimum spacing distances based on collar size.
Table 2: Minimum spacing distances required between ASTM F1960 expansion collars.
|
Nominal Collar Size |
Minimum Length of Cut Tubing |
|
|
in. |
in. |
cm |
|
1/2 |
3 |
7.62 |
|
3/4 |
4 |
10.16 |
|
1 |
5 |
12.70 |
|
1-1/4 |
6 |
15.24 |
|
1-1/2 |
7 |
17.78 |
|
2 |
8 |
20.32 |
Step #6
Refer to local plumbing codes for testing the installed system for leaks. Leaking connections should be cut out and replaced.
Cold Weather Installation:
- Ensure ambient temperature is above 5 °F (-15 °C).
- Cut the tubing to the desired length using a pipe cutter. The tubing should be cut perpendicular to the length of the tubing. The cut should be smooth, burr free, and square to the end of the pipe. A rough, jagged, or angled cut could affect the connection between the fitting and tubing and cause it to fail. Note: Do not use a hacksaw, pocket knife, hatchet, etc. Do not crush the outer diameter of the pipe with the cutter.
- Keep the expansion collar warm or warm the collar in your hands before sliding it on to the tubing.
- Follow the installation instructions from Step #2. Note: The tubing will contract slower at cooler temperatures.
- Refer to local plumbing codes for testing the installed system for leaks when the ambient temperature is at or below the freezing point of water.