Step #1:
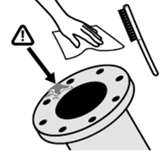
Prior to installation visually inspect and clean flanges, ensuring they are free from all dirt and debris.
Step #2: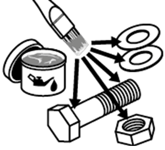
Lubricate the bolts, nuts, and nut bearing surface.
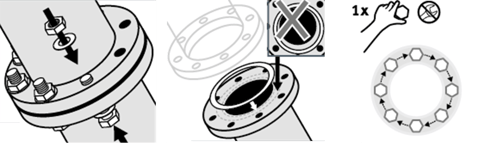
Step #3:
Install the new gasket, bolts, and nuts. Hand tighten the nuts and check to make sure the gasket is center. Note: never reuse an old gasket or install multiple gaskets.
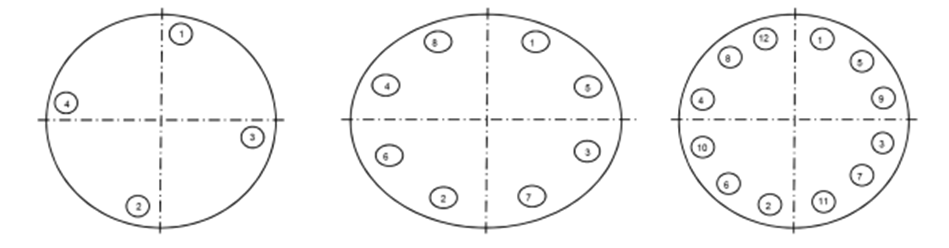
Step #4:
Number the bolts in a cross pattern sequence as per the diagram below.
Step #5:
Starting with bolt 1 and following the sequence, snug the bolts up to 10-20 ft/lbs torque (20% of the final torque) and check the gap for uniformity.
Step #6: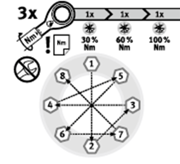
Proceed to tighten the bolts in sequence rounds to the following percent of final torque:
4-8 Bolt Pattern: Round 1 = 30%, Round 2 = 60%, Round 3 = 100%
12 Bolt Pattern: Round 1 = 20%, Round 2 = 40%, Round 3 = 80%, Round 4 = 100%
Step #7:
Check the gap around the flange between each round for uniform tightening, measured at every other bolt. If the gap is not uniform, adjust by tightening selective bolts until corrected.
Step #8:
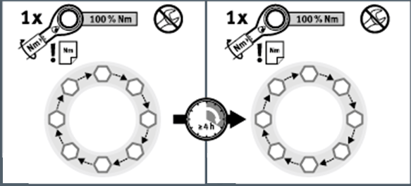
After 100% of torque has been reached, make on clockwise rotational round of tightening starting at bolt 1 until no further nut rotation occurs at 100% of the final torque.
Step #9:
Important Re-Torque: After 24 hours repeat round 3 or 4 followed by a rotational round to ensure proper torque is reached.

Additional Resources: