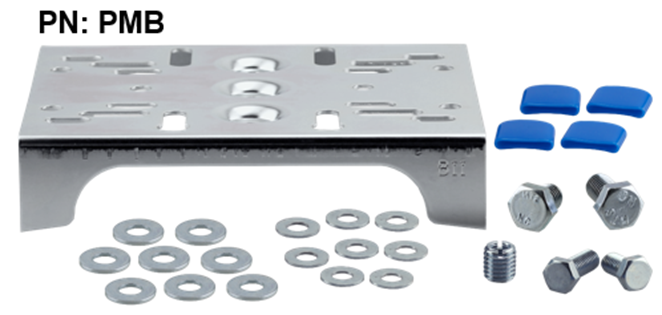
 The part number PMB universal pump mounting bracket is used to mount a pump to the top of a vertical pressure tank.
The bracket dimensions are: 7.5" wide x 8.97” long x 1.87” leg length.
 Pressure tanks are furnished with one of three top nut threads, 3/8”-16 UNC, 1/2”-13 UNC or 5/8”-11 UNC. The hardware kit supplied with this zinc plated pump stand bracket includes the following components to work with all three top nut sizes:
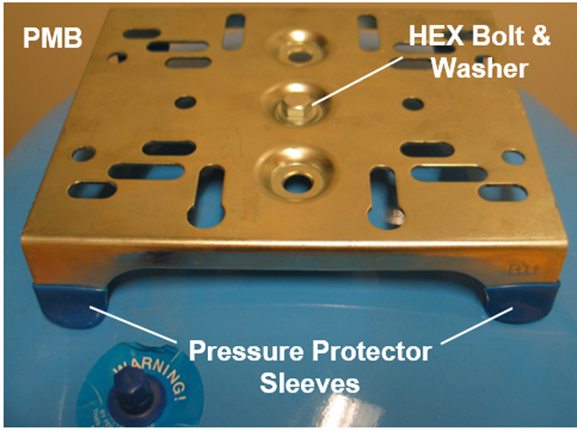
Qty. 1 3/8" – 16 UNC x 3/4" Zinc Plated Hex Bolt
Qty. 1 3/8" – 16 UNC x 1" Zinc Pated Hex Bolt
Qty. 8 3/8” Zinc Plated Flat Washers
Qty. 1 1/2" – 13 UNC x 3/4" Zinc Plated Hex Bolt
Qty. 1 1/2" - 13 UNC x 1" Zinc Pated Hex Bolt
Qty. 6 1/2” Zinc Plated Flat Washers
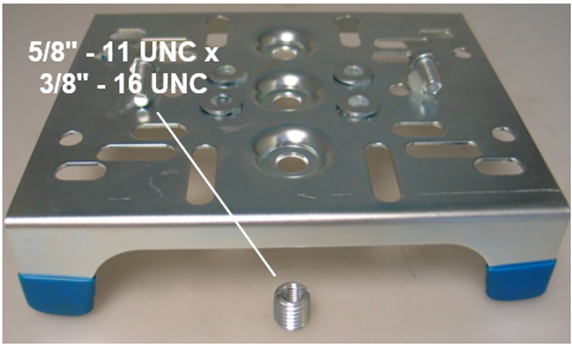
Qty. 1 5/8" - 11 UNC x 3/8" – 16 UNC Reducing Insert Bushing
Qty. 4 Blue Plastic Tank Protectors
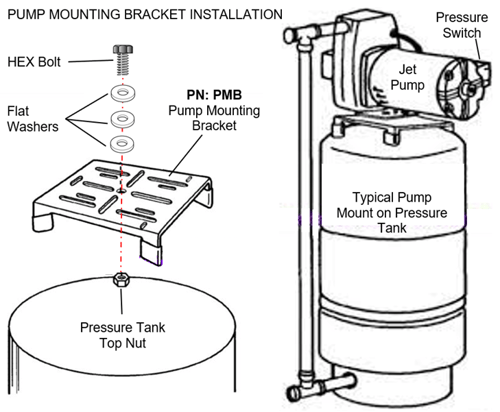
PART NO. PMB - UNIVERSAL PUMP MOUNTING BRACKET INSTALLATION INSTRUCTIONS
 STEP #1
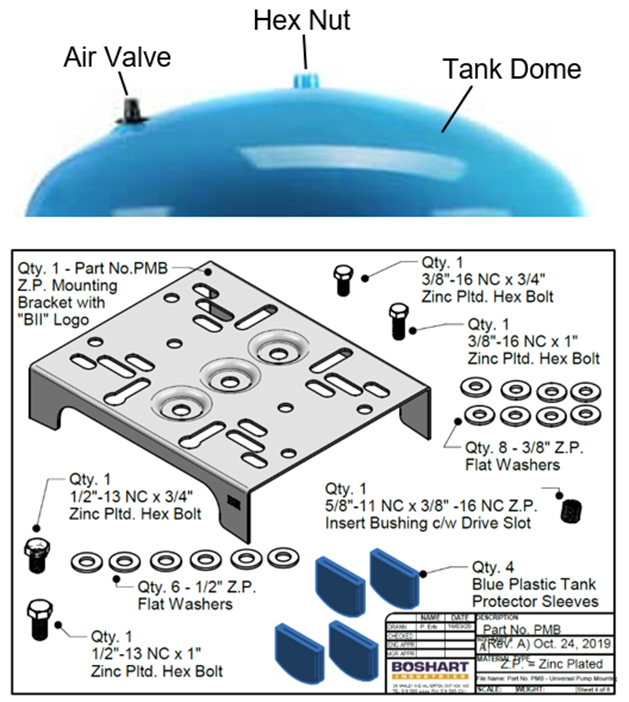
Determine what size of connection is on your tank. 16” diameter tanks typically have a 3/8”-16 UNC hex nut on the tank dome. Some models may have the ½” – 13 UNC nut. Larger diameter tanks 22” up to 26” may have either a 1/2” – 13 UNU or a 5/8” – 11 UNC hex nut on the top of the tank. If your tank is equipped with a 5/8” thread, you will attach the pump mounting bracket to the tank by first installing the 5/8” – 11 UNC x 3/8”-16 UNC reducing insert bushing to adapt to the 3/8” bolts.
 STEP #2
Install the four blue tank protectors on the legs of the mounting bracket.
STEP #3
Try using the shortest 3/4” long bolt and one washer. Finger tighten the bolt. You should have 2 to 2 & 1/2 turns of thread engagement. If the bolt bottoms out (touches the tank dome) before the bracket is tight, add additional washers. If the ¾” long bolt is too short and the threads do not engage in the tank nut connection, use the 1” long bolt with one or more washers. Again, if the bolt bottoms out before the bracket is tight add additional washers.
STEP #4
Wrench tighten until the bracket is secure, do not overtighten!
IMPORTANT: Never engage the bolt in the top of the tank more than 3 turns. Avoiding this may require adding additional washers under the bolt head depending on the make/model of the pressure tank. Enough washers must be used so the end of the bolt does not contact the tank shell/dome. Failure to use enough washers may result in puncturing the tank when wrench tightening.
 WARNING: DO NOT puncture the tank when tightening! If you puncture the tank shell it will void the tank warranty.